Madd Gear Urban Glide Scooter Assembly InstructionsUpdated 3 months ago
Congratulations on the purchase of your Madd Gear Urban Glide Scooters. Here's step by step instructions on how to assemble your new scooter.
Your scooter is mostly assembled but you do need to install the handlebar and wheels to get up and riding. Follow along and you'll be rolling in no time.
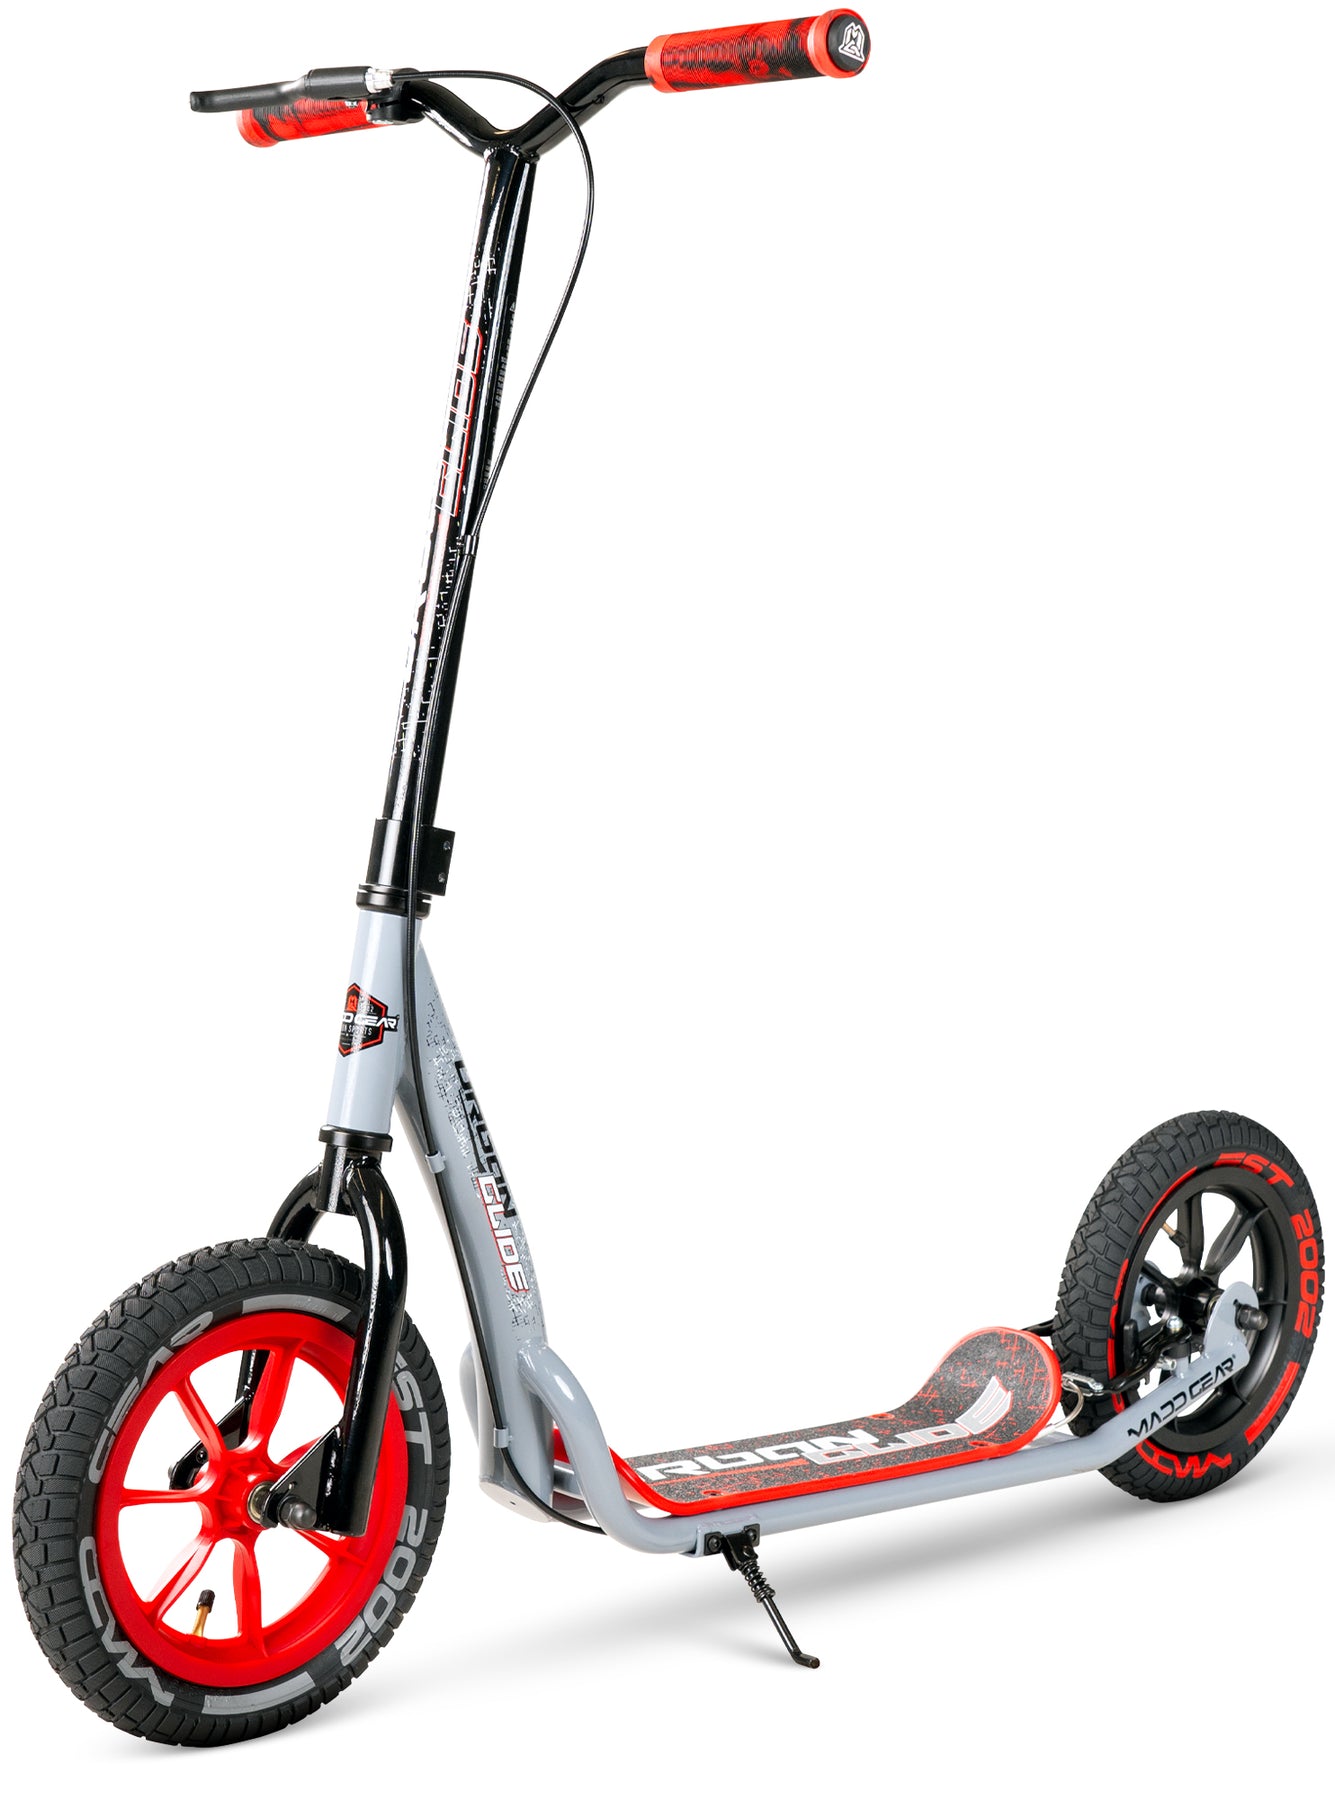
Step 1. Install the handlebar. The handlebar slides down over the headset compression shim. Please note, the fitting will be tight so you may need to use a little force to slide the handlebar down over the shim or fork steerer tube.
Before sliding the handlebar on, loosen the two Allen wrench bolts in the clamp to ensure there is no additional tension squeezing the handlebar.
Now, slide the handlebar and clamp down and into place.
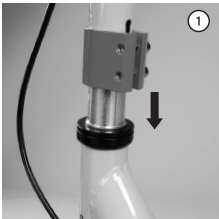
Step 2. Tighten the clamp. Align the handlebar with the fork before tightening the clamp.
Ensure the clamp is pushed down all the way and sits flush on top of the headset dust cover, the circular black piece.
Align the clamp opening with the slit in the rear of the handlebar.
Note: The correct process to tighten the double clamp is to start with one bolt and tighten so it is just snug. Then move to the other bolt and tighten until just snug. Now, move back to the first bolt. Repeat this process between the two bolts until both are evenly tightened. This will ensure your fork stays aligned with your handlebars.
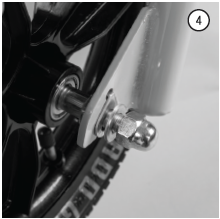
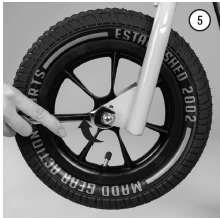
Step 3. Now, let's install your front wheel. Start by loosening the two nuts on either end of your wheel assembly. Do not remove them completely. They just need to be holding on by a couple of threads as this will allow you to install the wheel without the washers getting in the way.
Now that your axle nuts are loosened, slide your front wheel into the fork locating slots. The washers should sit on the outside of the fork.

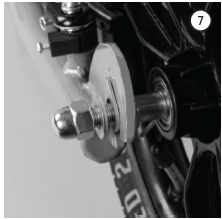
Step 4. Take special note of the washer with the hook in it. This hook aligns with the locating hole in the fork. Line this washer up with the hole before tightening your axle nuts.
Important: This washer is a safety feature, and care should be taken to ensure this is installed correctly.
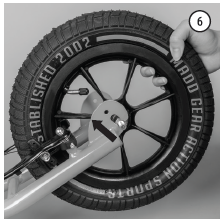
Step 5. Once you have hand tightened those axle nuts, locate your supplied open-ended wrenches. Use these to securely tighten the axle nuts. The wheel should still spin freely when the axle nuts have been tightened.
Step 6. Next, we will move onto installing the rear wheel. The tires and tubes are shipped with low pressure to make installing the rear wheel easy as you slide the tire through the brake calipers.
Step 7. Repeat the process from installing the front wheel, ensuring the locking washer aligns with the locating hole in the frame and hand tightening the axle nuts before moving to the next step.
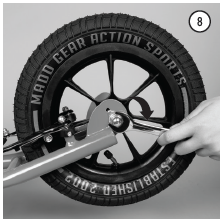
Step 8. Using your supplied open-ended wrenches, tighten the rear axle securely. There should be no play from side to side and the wheel should spin freely.
Step 9. Spin your rear wheel to check for brake pad clearance. Ensure the brake pads align with the flat side of the rim and adjust using your Allen wrench if necessary.
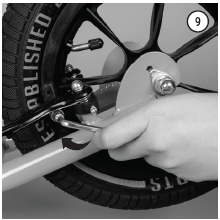
Basic adjustment: If you find your brake is too loose and you need to pull the brake lever in too far, you can adjust brake cable tension using the barrel adjuster at the brake lever on the handlebar.
If you find your brake is dragging on one side or needs additional fine-tuning, you can follow this linear pull brake adjustment video which outlines every aspect of this braking system.
Step 10. Ensure your brake cable line is secured in position and the rubber boot covers the cable housing end to avoid any debris getting into your brake cable or system.

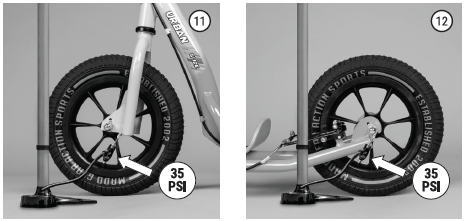
Step 11-12. Now it's time to inflate your tires to the recommended 35psi. To ensure your scooter runs smoothly, as you inflate your tires, check that the tire is evenly seated on the rim.
The tire should not be pinches in on one side and the tire should be centrally located on the rim.
Note: If you do wear out your tires or get a flat, we offer a replacement wheel assembly kit here which makes it easy to get back up and running.

Check over your nuts and bolts, spin your wheels, check your brakes are working and you're now ready to roll on your new Madd Gear Urban Glide scooter.
If you need any further assistance, please reach out to our customer service team and we'll happily help with any questions.